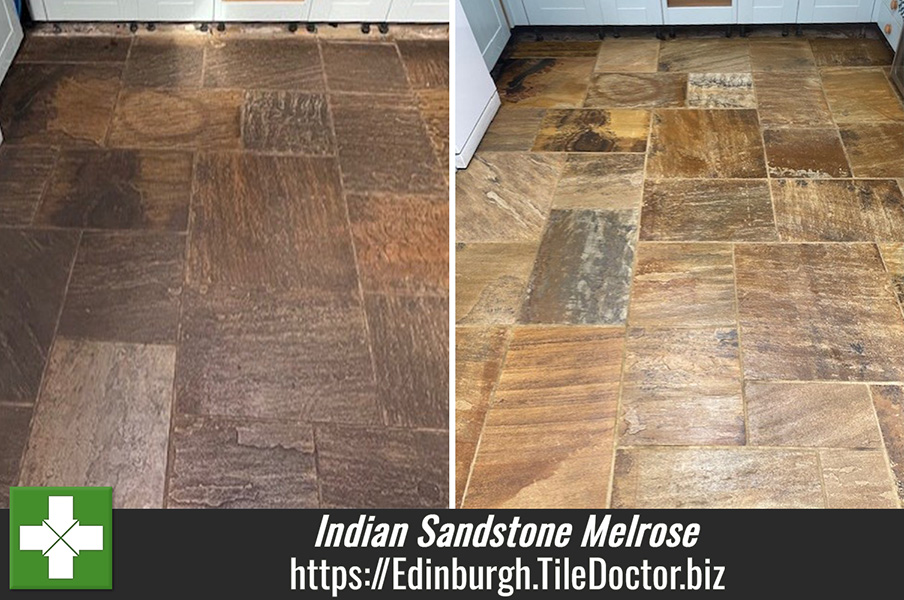
Badly Ingrained Indian Sandstone Floor Deep Cleaned and Sealed in Melrose
This Indian Sandstone tiled floor had been installed in the Kitchen and Dining room a property in Melrose fifty years prior. Although it was cleaned weekly the sealer had long since failed and dirt had penetrated the pores of the stone leaving it permanently dark.
The years of ingrained soiling were especially bad around the cooker and sink areas, making it impossible for standard cleaning products to make any difference. The wonderful colours and markings of each stone tile were completely hidden due to the soiling. Interestingly you could still see the original colour of the clean sandstone behind the kickboards under the kitchen units so the owner had a good idea of the floor’s potential.

I explained the floor would need an intensive clean to flush the years of dirt out of the pores and then a fresh sealer added to protect it going forward. Keen to have the floor restored to its original condition they accepted my quote, and a date was set for the work to start which would take two days.
Cleaning an Indian Sandstone Kitchen
On day one I removed the kick boards and started deep cleaning the Sandstone to remove the ingrained soiling. To do this the tiles were soaked with a strong dilution of Tile Doctor Remove & Go and this was left to soak in for fifteen minutes. This gives the solution time to digest the dirt and any remaining sealer so it can be lifted to the surface and cleaned away.
The floor was then scrubbed with a special silicon carbide brush fitted to a rotary floor machine. This brush really gets into the recesses of the grout lines and helps to scrub the dirt out of the stone especially if it has a riven surface.
After going over each of the stone tiles three to four times with the brush the floor was rinsed with water and all the residue removed with a wet vacuum. The floor was then given a second clean and thorough rinse to ensure all the residue had been removed.
A third clean was then completed using Tile Doctors Grout Clean-Up, which further cleans the stone and also treats efflorescence. This time the product was scrubbed in with a black pad. Once completed the floor was again rinsed with water and the residues removed with a wet vacuum as before.
Sealing an Indian Sandstone Kitchen
The floor was then left over night to dry, and I returned the next day where work started by ensuring the floor was dry by testing the moisture levels on various parts of the floor. It’s important that the floor is dry before sealing as otherwise it can look patchy.
All was well and so I started with the first coat of Tile Doctors Ultra-Seal, a natural look impregnating sealer, chosen by the client. This was allowed to dry for thirty minutes before starting on the second coat. This sealer is a tough durable sealer with a matt finish.
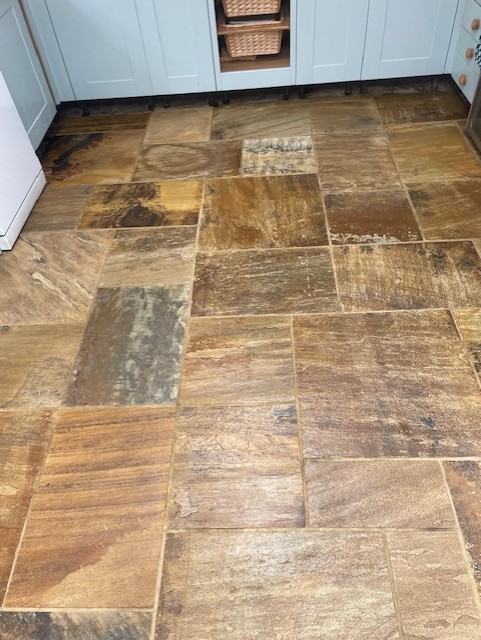
Once complete the Sandstone tiles and grout looked very clean indeed and all the features of the stone were clearly visible returning the character to the floor. To maintain the fresh look and sealer going forward I recommended the tiles were cleaned using a Tile Doctors Neutral pH cleaner which lifts soiling but won’t erode the sealer.
Professional Restoration of an Indian Sandstone Kitchen in Edinburgh
Badly Ingrained Indian Sandstone Floor Deep Cleaned and Sealed in Melrose Read More »