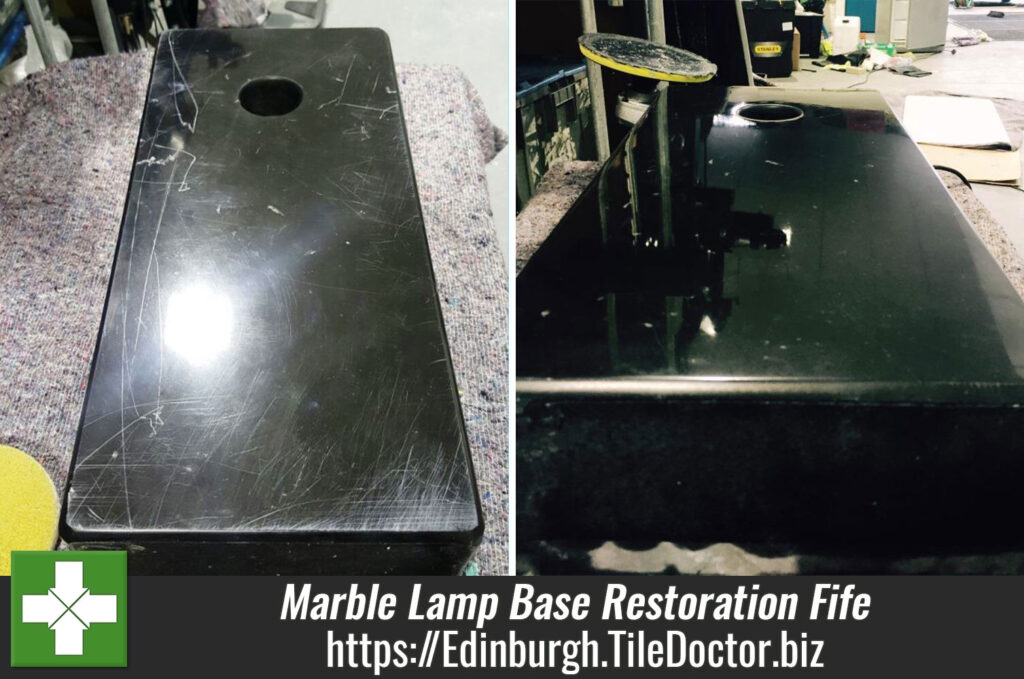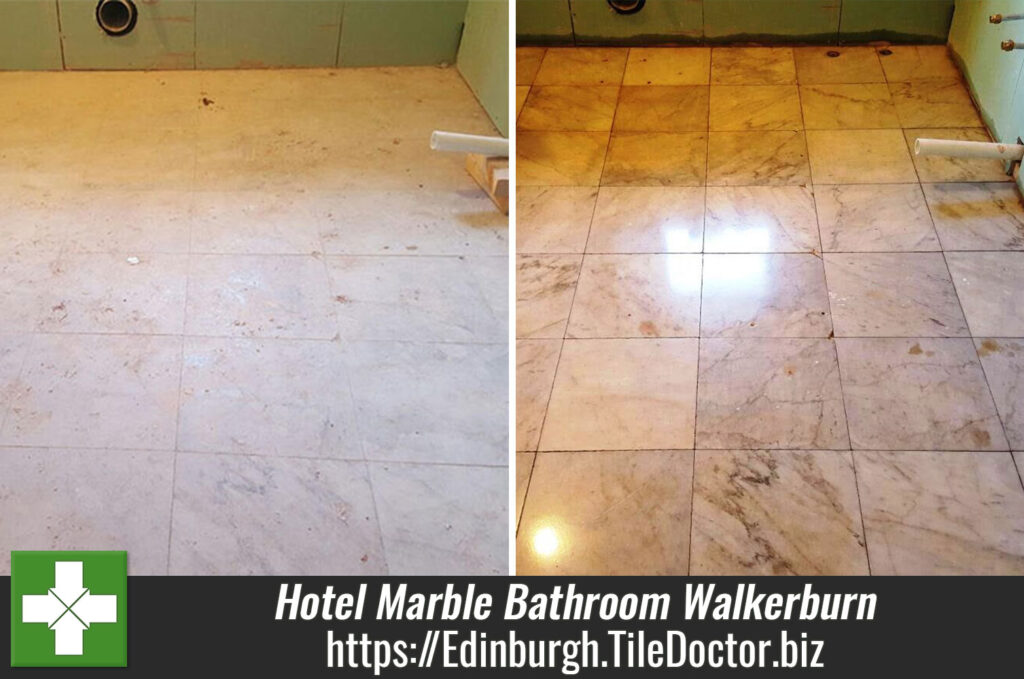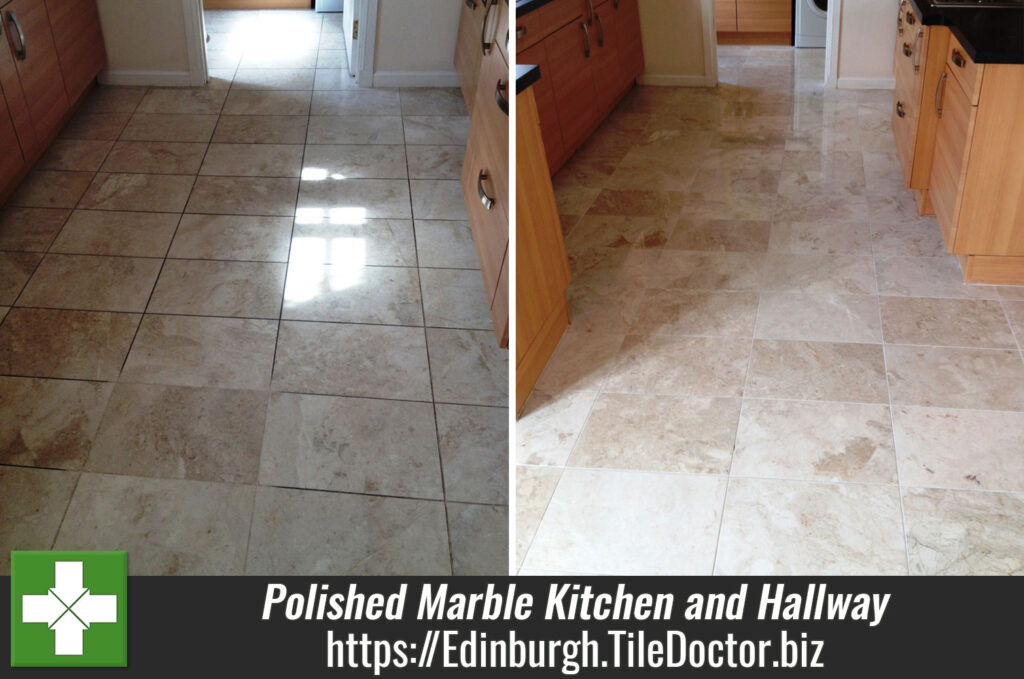

Marble tiled vestibule cleaned and polished in Edinburgh
I was asked to take a look at this small but beautiful Marble tiled vestibule at the entrance to a lovely house in Edinburgh. As you can see from the photograph below the colours in the Marble were looking washed out and the overall appearance was dull and lifeless. As the main entrance it must have seen a lot of foot traffic and a fair amount of wear and abuse over the years.

Cleaning and Polishing Marble Tiles
The first task was to brush and vacuum the floor to remove debris and grit. After this the floor was sprayed with a dilution of Tile Doctor Pro-Clean a tile cleaner that is safe to use on stone floors and scrubbed in with a black buffing pad fitted to a rotary machine. This released a lot of dirt from the tile and the soiled cleaning solution was then rinsed off with water and extracted using a wet vacuum.
Once the floor had all the surface dirt removed we then proceeded to polish the marble with a set of diamond burnishing pads which restore the shine the stone. The burnishing pads come in a set of four and you start with a coarse pad with a little water and work your way through the set moving from a the coarse pads through to the finer pads; this process polishes the stone more and more until you get a smooth finish. After each pad was used the area was thoroughly rinsed with clean water to remove any slurry kicked up by the process before moving onto the next. Once we had gone through all four pads the floor was left clean, smooth and shiny.
Sealing Marble Tiles
Being a high traffic area I wanted to leave a very durable polish that would last for years to come, so once the burnishing process was completed we proceeded to seal and further polish the Marble by buffing the floor with Tile Doctor Shine Powder. The crystallising powder provides a very high shine and a tough durable finish, ideal for this situation.

I think you will agree we have managed to put the life back into the floor which is especially important in hallway’s and entrances like this as they are the first thing you see when you come into the property.
Marble Tiled Entrance Restored in Edinburgh
Marble tiled vestibule cleaned and polished in Edinburgh Read More »