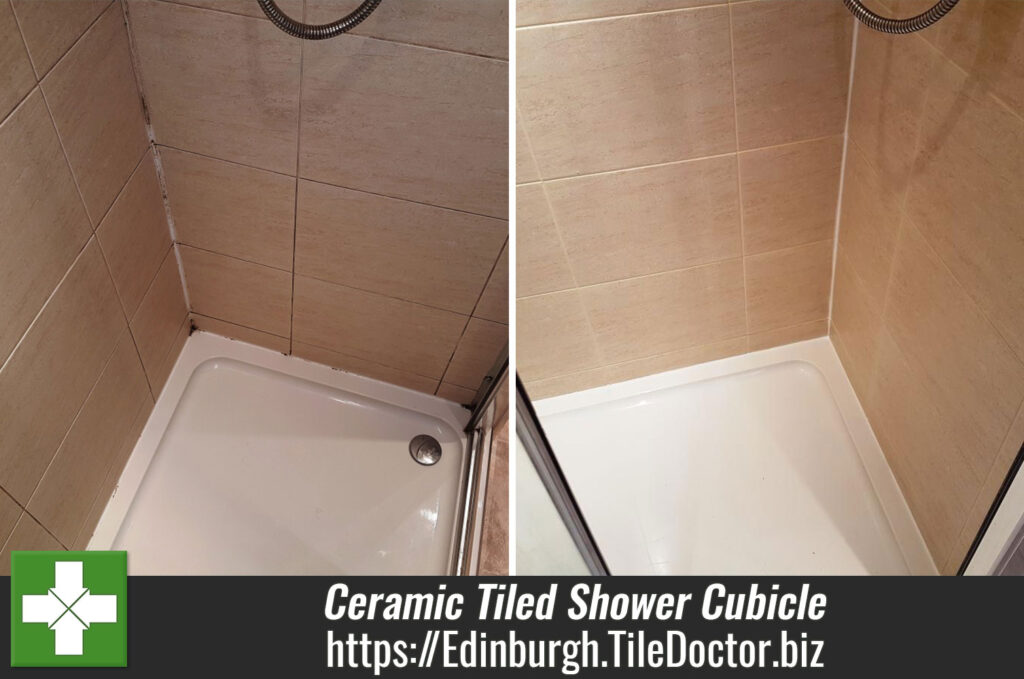
This is a great example of the difference we can make to a Shower Cubicle which suffer from a build up of soap scum, mould and staining from the dyes in shampoos and soaps etc.


Cleaning Ceramic Tiled Shower Cubicle
The first step was to remove the wire accessory holder and then soak all the tile and grout in a strong solution of Tile Doctor Pro-Clean. I find decanting into a spray bottle works best as it mixes it with air which makes it easier to stick to the wall.
With the Pro-Clean in place it was then hand scrubbed to get the tile and especially the grout clean of all the mould and other stains. The shower walls were rinsed down and the process repeated where necessary.
Grout Colouring Shower Wall Tiles
With the tiles and grout now clean we could see that the grout was still discoloured in some areas where it had been badly stained. One option at this point would be rake out the grout and replace with new however overtime it would only discolour again, so in agreement with the customer we applied a grout colourant in a Limestone colour to better match the tile.
The Grout Colourant would ensure all the grout had a consistent appearance while also adding an impenetrable barrier that will keep its appearance for a long time. It takes a little time to do but is easily applied with a small brush and then you wipe off any excess that gets onto the tile.
The next step was to strip out the mastic silicone sealant strip from around the base of the shower cubicle and replace with new. I used high quality silicone sealant that left nice lines and fresh look, don’t use cheap sealant as it will soon discolour and some have been known to shrink.


If the silicone and grout isn’t too badly stained you can clean off the mould using Tile Doctor Mould Away, it’s very easy to use, you simply spray the Silicone or Grout with Mould Away then leave to soak in for five minutes (or much longer if necessary) and then scrub with a brush and rinse with water repeating the process until the mould has disappeared.