Grout Cleaning

Welcome to my Work History archive where you will find detailed examples of the cleaning and renovation of Grout carried out in Edinburgh

Cleaning and Renovating Grout

The top layer of grout is porous and can absorb grease, dirt and limescale. Spillages such as wine, lemonades or greasy substances will cause marks and patches in the joints in the floor. Grout between wall-tiles particularly in damp areas like bathrooms will become dirty and unattractive as a result of Mould, Mildew and Limescale.

Mould is one of the most unsightly problems, which usually starts off in the wettest area of the room, this could be the bottom of the shower or bath, then starts to spread and if left unchecked could cover a large area of the wall.

Another common issue we find is a problem known as Grout Haze or Grout Smearing where a thin layer of grout has been left to set on the surface of the tile. Once grout has set it is difficult to remove.

Discolouration of grout joints in bath or shower areas due to continued use of acid formulated shampoos and soaps. This causes yellow orange and pink stains to the grout over even a short period of time. Whilst Grout Joints can be cleaned, badly stained grout may need to be re-coloured.

Protecting your grout in advance with a sealer will prevent most of these issues and although relatively unknown in the UK, protection awareness is growing. Sealing forms an invisible barrier between the grout and the surface, this will then protect your investment for years to come.

We have solutions for all the problems listed above and below you will find detailed examples of work we have carried out in the past to resolve many of these issues. It should give you some idea of what’s involved and what can be achieved with the right techniques and products.


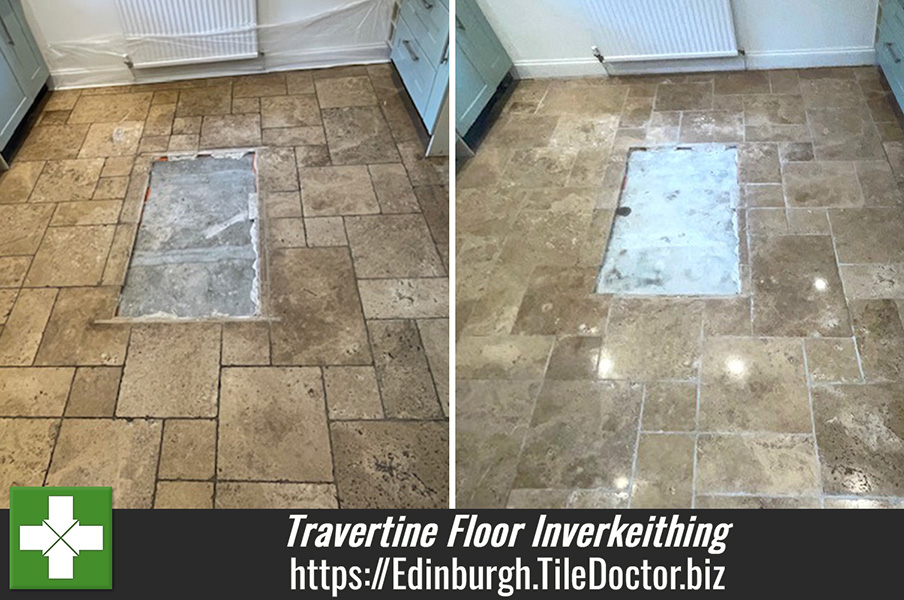
Travertine Tiled Floor Before After Polishing Edinburgh

Travertine Tiled Floor Cleaned, Polished and Sealed in Edinburgh

This is a travertine floor had been laid in the Kitchen and Dining room of a house on the outskirts of Edinburgh. It had been some time since it had last been polished and the stone had become dull in appearance and some of the grout had become grubby with dirt. This is a common problem with Stone floors which will lose their appearance overtime with general usage and this is why we recommend an annual maintenance visit where in a few hours we re-polish the stone and top-up the sealer.

Travertine Floor Before Renovation Edinburgh

Having explained what was required to restore the floor a quote was provided to cover the work and materials which would take two days. The quote was agreed, and a date set to start the work.

Travertine Floor Before Renovation Edinburgh

Cleaning and Polishing Travertine Floor Tiles

On the first day we gave the floor a thorough clean with a strong dilution of Tile Doctor Pro-Clean to remove what was left of the old sealer and surface dirt. Pro-Clean is a versatile tile and grout cleaner that is safe to use on natural stone. We use a floor buffer fitted with a black pad running at slow speed to work the solution into the Travertine. Once done the soiled solution is rinsed away with water and then extracted with a wet vacuum. Having the right tools for this work really helps achieve a thorough and quicker result.

Once I was satisfied with cleaning, I set about using a set of Diamond encrusted burnishing pads fitted to a rotary machine. Applied with water which lubricates the process this system closes the pores in the stone and restores the polished appearance. The system comprises four main pads of varying grit and I began by applying the coarse 400-grit pad, before moving on to medium 800-grit and then finishing with the fine 1500-grit pad. The floor has to be rinsed with more water between each pad to remove the soil that is generated, again a wet vacuum come in very handy for extracting the slurry.

The grout was also scrubbed by hand using more Pro-Clean and stiff brush as the pads can struggle to reach down into the recess of the grout lines.

Sealing a Travertine Floor

The floor was left to dry off overnight and then the next day work continued with the application of the fourth burnishing pad in the set which is a very fine 3000-grit pad. This pad is applied dry to the floor with a spray of water using a technique we call a ‘Spray Burnish’. This final pad brings up the polished appearance of the stone even further and has the added advantage of leaving the floor dry.

To seal the Travertine my choice of sealer was Tile Doctor Colour Grow, which was applied in two separate coats. The sealer will protect the floor against wear and tear, while also enhancing the natural shades in the Travertine thanks to the sealer’s colour intensifying formula. Once the second coat was dry, I ran over the floor with a white buffing pad to remove any excess sealer and to further buff up the appearance of the stone.

Travertine Floor After Renovation Edinburgh

The floor responded well to the treatment and the colours in the Travertine have really come alive. Before leaving I left the owner with a bottle of Tile Doctor Stone Soap which they can use for the regular cleaning of the floor. This product is especially recommended for the maintenance cleaning of polished stone as its sealer safe and will help maintain the patina.

Travertine Floor After Renovation Edinburgh


Professional Travertine Floor Polishing Service in Midlothian

Travertine Tiled Floor Cleaned, Polished and Sealed in Edinburgh Read More »
Porcelain Shower Cubicle Tiles Expertly Refreshed in Edinburgh

Porcelain Shower Cubicle Tiles Expertly Refreshed in Edinburgh

Porcelain is a popular choice for tiles in modern homes due to its superior durability. It also makes a particularly suitable material for shower tiles because of its natural water resistance. Nonetheless, Porcelain tiles – just like any other type of tile – still require routine cleaning and maintenance to stay looking fresh and attractive.

This is especially the case for shower tiles, as they are subject to mould and scum caused by exposure to the dyes in shampoos and soaps etc which as well as staining the tiles can have a dramatic effect on the grout. Below is a photo of a Porcelain shower cubicle I was asked to restore in Edinburgh. The process for restoring these types of tiles is relatively quick and easy, providing you use the right products and methods. Here’s how I did it.

Shower Grout Before Restoration in Edinburgh

Cleaning and Sealing Porcelain Shower Cubicle Tiles

To begin refreshing this cubicle, I gave the whole area – paying particular attention to the grout lines – a scrub down using Tile Doctor Duo Clean. Duo Clean is our product of choice for the removal of the common mould and soap scum that builds up on cubicles like this one.

Next, I rinsed down the area with fresh water to remove any trace of cleaning product and then left it to dry for a short period of time. It’s difficult to get the grout lines perfectly clean, especially after years of neglect, but we can resolve the situation by simply recolouring the grout.

Shower Grout During Restoration in Edinburgh
I this case I felt the grout although cleaner from when I started did need more work so I decided to go ahead and apply a Grout Colourant. Tile Doctor has a range of Grout Colourants available in ten colours so I painted on three coats of the white colourant which really improved the look of the grout leaving it clean and fresh. Another advantage is the colourant acts as a barrier on top of the grout sealing the grout joint and protecting them from further staining. Other popular colours available in the range include Black, Cappuccino, and three shades of Grey.

Finally, I ripped and out and replaced the mouldy silicone around the base of the shower cubicle and replaced it with fresh.

Shower Grout After Restoration in Edinburgh
The client was very impressed with the speedy restoration. Before leaving the property, I explained that rinsing down the shower cubicle with fresh water after every use can help to reduce the effect of staining and leaving the door and window open after a shower improved ventilation and inhibit the growth of mould. Naturally you can always give me call if the situation gets out of hand.

Professional Tile Cleaning, Grout Recolouring and Sealing for a Mouldy Porcelain Shower Cubicle Restoration in Edinburgh

Porcelain Shower Cubicle Tiles Expertly Refreshed in Edinburgh Read More »

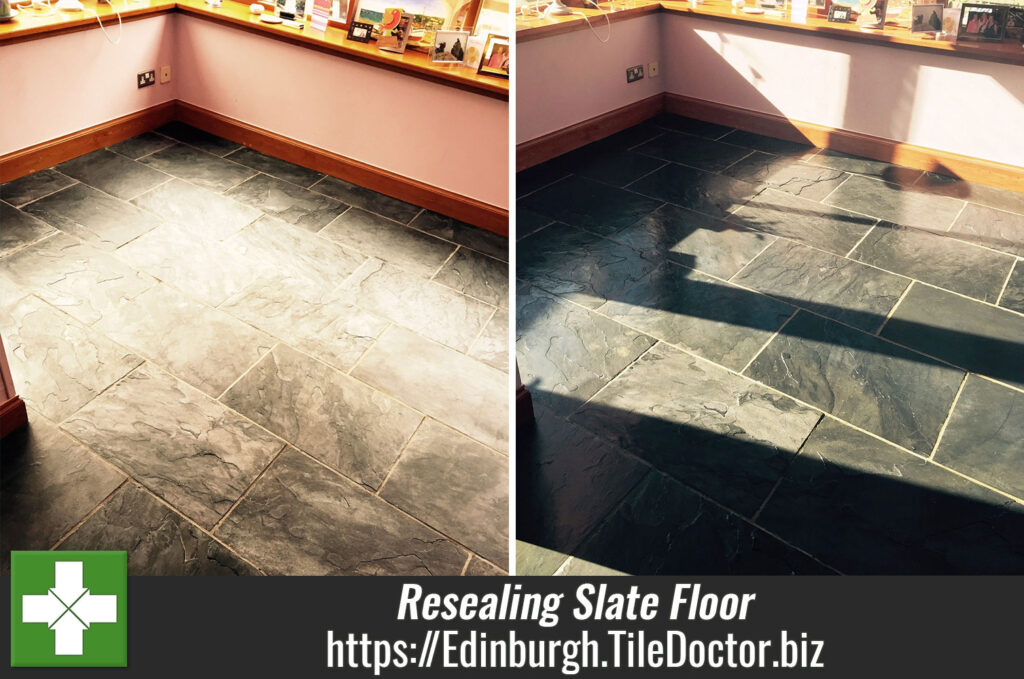
Slate Tiled Floor Stripped, Cleaned and Resealed in Edinburgh

Slate Tiled Floor Stripped, Cleaned and Resealed in Edinburgh

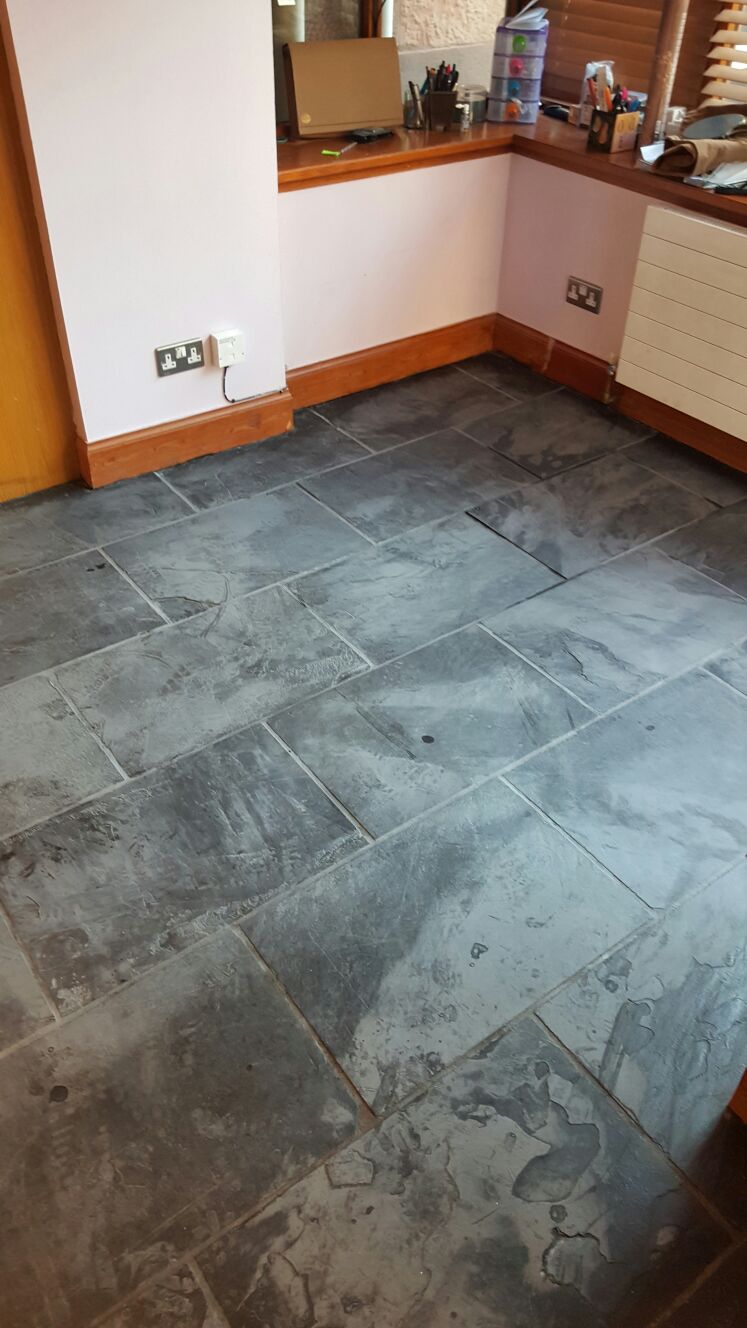
Natural stone products such as Slate need to be sealed for it to look its best, the sealer brings out the best in the natural features and also protects the stone from dirt becoming ingrained in its pores and once that happens it becomes difficult to clean effectively and starts to lose its appearance.

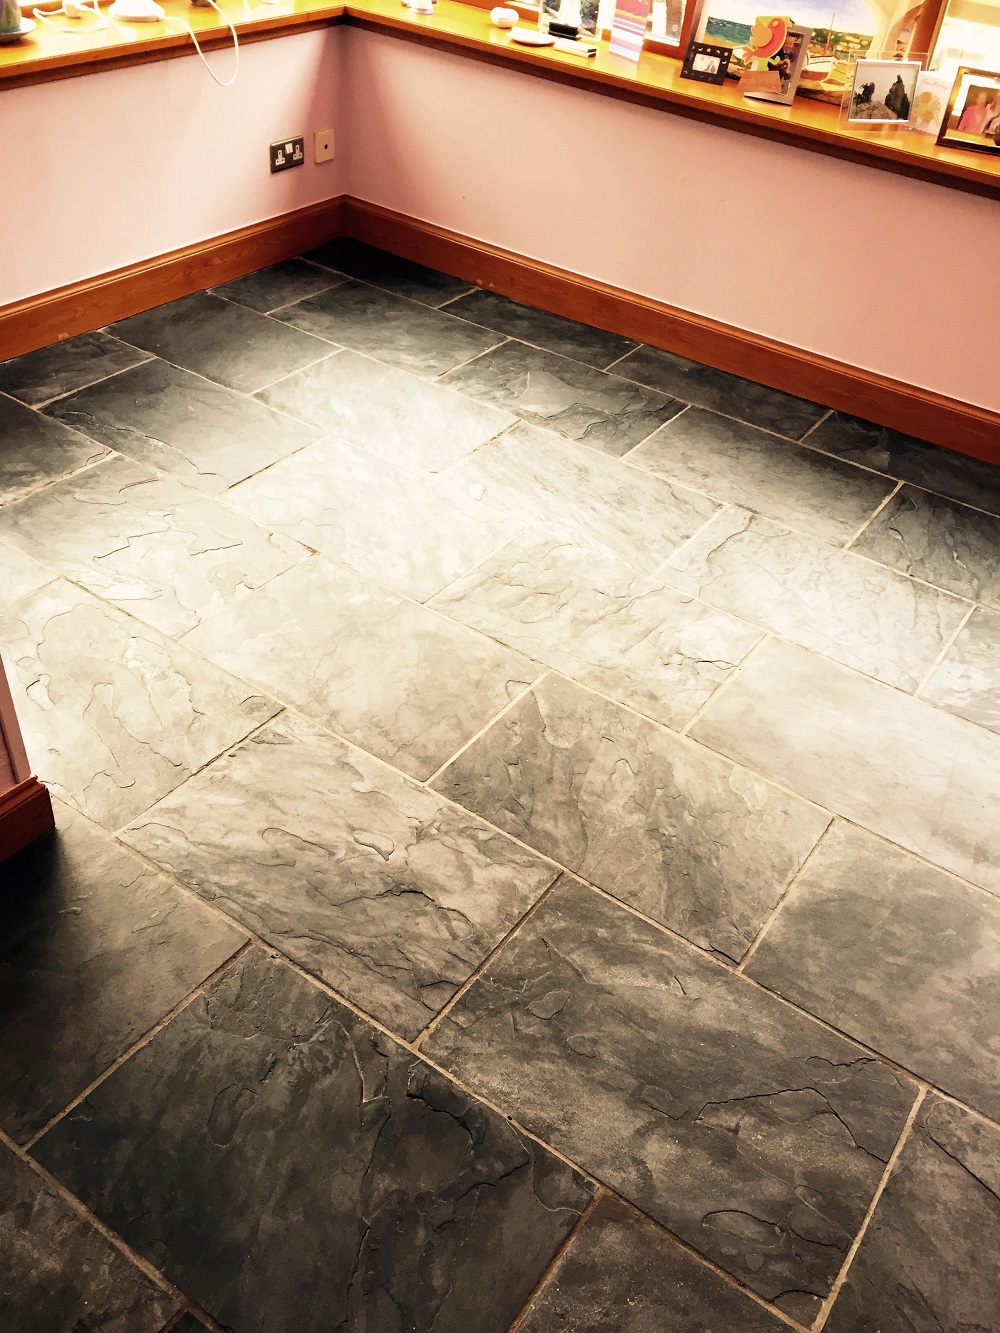
A good example of this is the Slate Tiled Floor shown below where that we were asked to maintain in Edinburgh, the sealer had worn off allowing the stone to dull and the grout to become stained.

Slate Tiled Floor Before Cleaning Edinburgh

Cleaning Slates Flooring and Grout

There was still evidence of the previous sealer on the floor so the first job was to strip that off completely using a 50:50 solution of two Tile Doctor products, Pro-Clean and Remove and Go. The two products combined together make a powerful cleaner/stripper combination which was left to dwell and soak into the tile and grout for 10-15minutes.

Next step was to scrub the solution into the floor using a scrubbing pad fitted to a rotary machine and a stiff narrow brush was run along the grout lines. The now dirty solution was then extracted from the floor using a wet vacuum and the process repeated until all the previous sealers and coatings had been removed from the floor. The floor was then given a clean using just Pro-Clean to make sure all dirt had been removed again using a wet vacuum to extract the solution.

The final part of this process was then to give the floor a rinse with a diluted solution of Tile Doctor Neutral Cleaner to remove any trace of strong cleaning products and the wet vacuum was used to get the floor as dry as possible ready for sealing the next day.

Slate Tiled Floor Stripped Ready for sealing Edinburgh

Sealing Slate Floor Tiles

The floor was left overnight to dry and the following day we returned to seal the floor checking first it was dry. Sealing was done by applying five coats of Tile Doctor Seal and Go which will protect the floor going forward, adds a nice low sheen and works very well on Slate, Quarry and Victorian tiles.

Slate Tiled Floor After Sealing Edinburgh
The Slate floor came out really well and the tiles and grout now look like they were recently installed.

Slate Tile and Grout Floor Maintenance in Edinburgh

Slate Tiled Floor Stripped, Cleaned and Resealed in Edinburgh Read More »
External Quarry Tile Steps and Grout Cleaned in Kirkliston

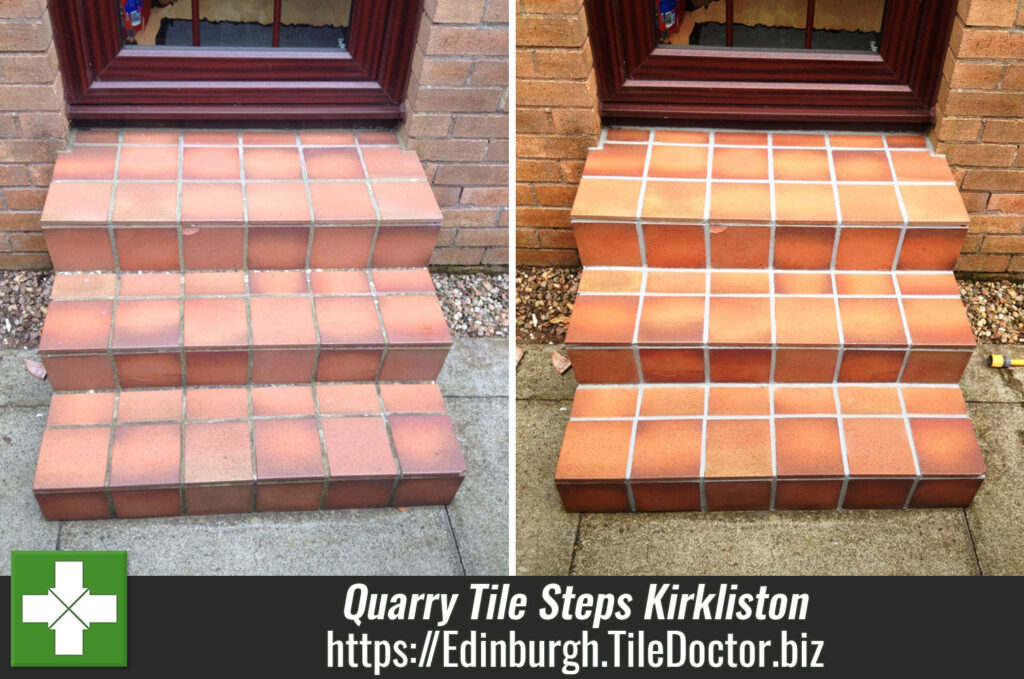
External Quarry Tile Steps and Grout Cleaned in Kirkliston

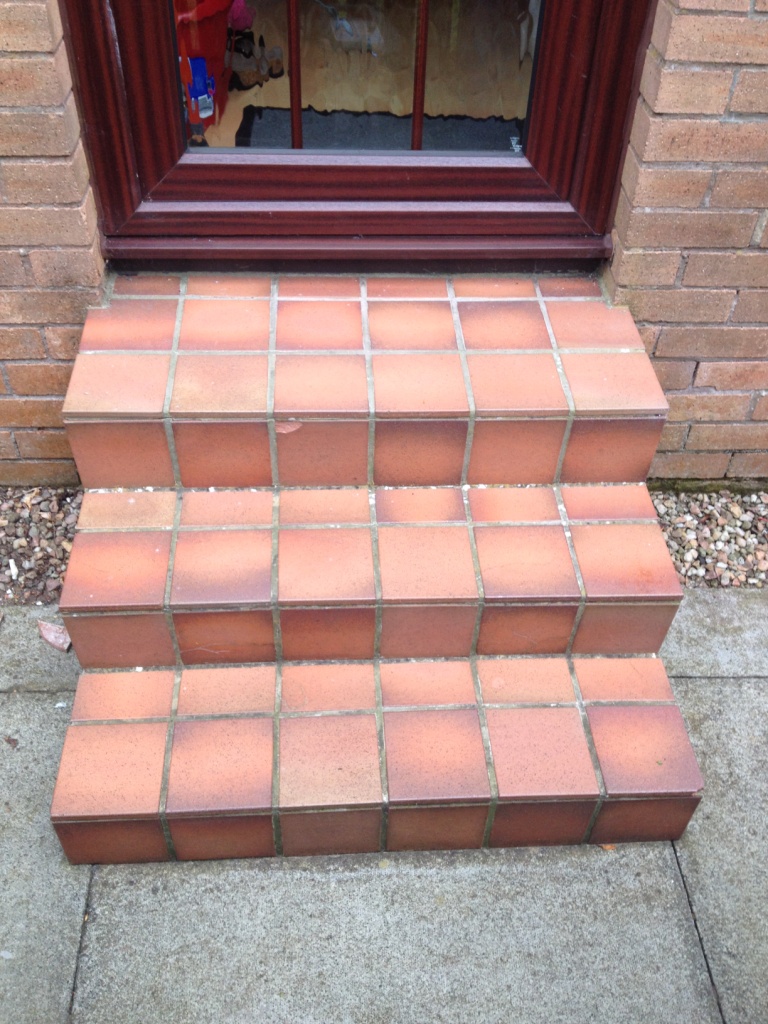
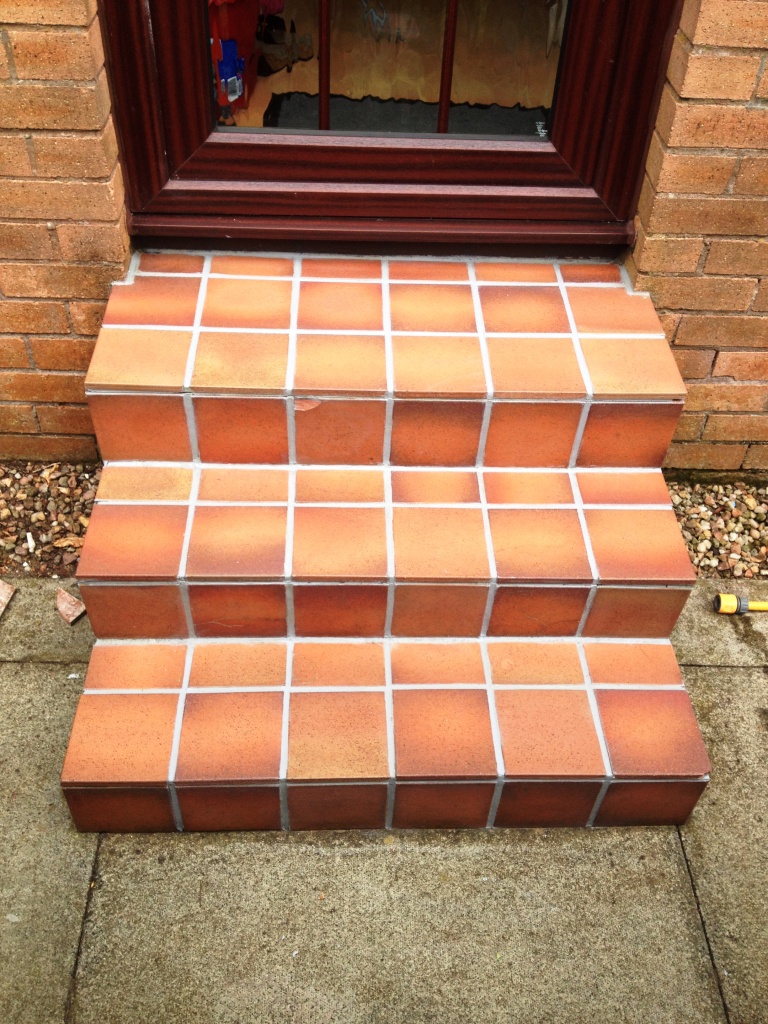
The photographs below are from a set of steps outside a house in the small West Lothian town of Kirkliston near Edinburgh airport and as you can see from the photograph the Quarry Tiled steps and Grout were looking tired and now in need of a good deep clean.

External Quarry Tile Steps Before Cleaning

Cleaning Quarry Tile and Grout

To get them clean we scrubbed in a strong solution of Tile Doctor Pro-Clean, it was a small area so this was done by hand using water to rinse away the soiled cleaning solution. The process was repeated until the dirt and grime had been removed and particular attention was applied to the grout using a stiff brush and plenty of elbow grease. Cleaning tiles outside does have its advantages as there is less preparation required but drying can take longer if it’s a cold day or shady spot.

Grout Colouring Quarry Tiles

Despite our best efforts to get the grout clean there was still evidence of staining so once it was dry the grout was coloured with 2 coats of grout colourant. The top layer of grout is actually porous so it will become ingrained with dirt over time that makes cleaning very difficult, the grout colourant product we use however forms an epoxy barrier over the grout which seals the grout and makes it easy to clean. Once complete and dry the steps were finished off with a wipe down using Tile Doctor Neutral Cleaner.

External Quarry Tile Steps After Cleaning
 

Quarry Tile Steps and Grout Refreshed in Kirkliston near Edinburgh Airport

External Quarry Tile Steps and Grout Cleaned in Kirkliston Read More »
Stained Quarry Tile Grout Cleaned and Coloured in Livingston

Stained Quarry Tile Grout Cleaned and Coloured in Livingston

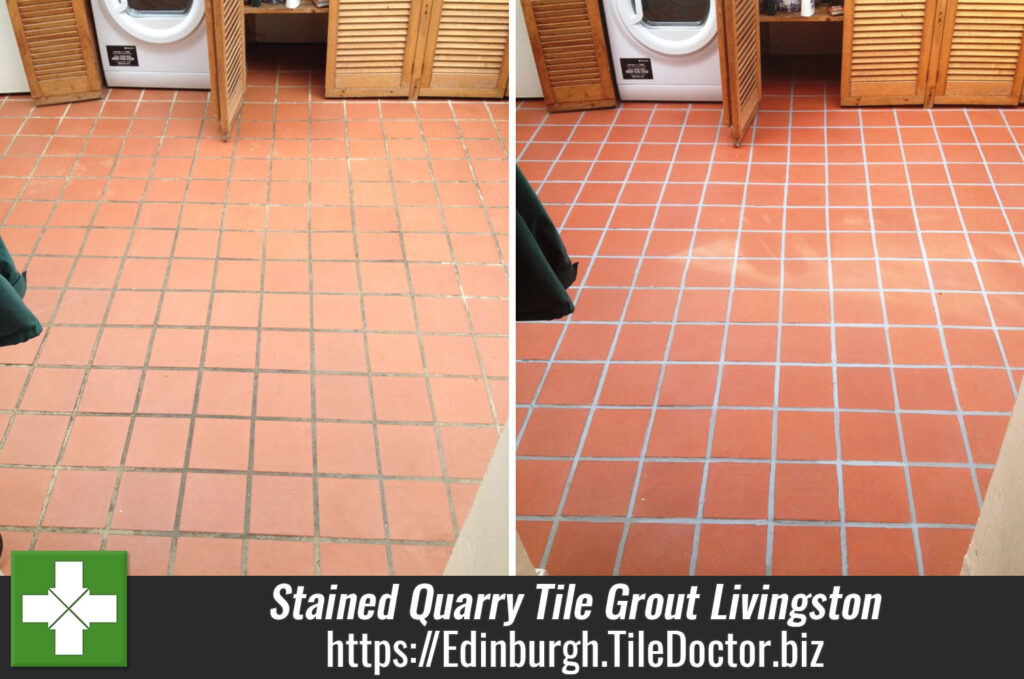
The grout on this Quarry tiled floor in the kitchen of a house in Livingston near Edinburgh was proving impossible to clean effectively and had now become badly stained with dirt and grime and had gone dark in the process making it obviously dirty when compared with the clean areas.

Quarry Tiles Before Cleaning and Colouring

Cleaning Tile and Grout

The first step when cleaning grout is to apply a strong solution of Tile Doctor Pro-Clean which is a strong alkaline cleaning agent. The solution is mopped onto the tile and grout and then scrubbed in by hand with a stiff brush along the grout lines, Pro-Clean is also a good general tile cleaner so it worked well on the Quarry Tiles as well. The soiled cleaning solution was rinsed away with water and as much water as possible was removed using a wet vacuum. Next we left the floor to allow it to dry leaving a turbo air mover in help to speed up the process.

Quarry Tiles Before Cleaning and Colouring

Sealing Quarry Tiles

When the floor was dry it was clear that the grout would never be clean enough to match with the areas that were still white so we agreed to apply a white epoxy Grout Colourant to resolve the problem. The group colourant is applied by hand and is painted onto the grout using a small brush; any excess is then wiped off the tile. Two coats were required on this floor.

Quarry Tiles After Cleaning and Colouring
The floor now looks like it has come back to life and as you can see all the grout now has a uniform colour and should stay that way for a long time as the added advantage of an epoxy grout colourant is it forms a barrier over the grout that will seal and protected it.

Quarry Tiles After Cleaning and Colouring
 

Quarry Tile and Grout Cleaning and Colouring in Livingston, West Lothian

Stained Quarry Tile Grout Cleaned and Coloured in Livingston Read More »
Stained Ceramic Tiled Shower Cubicle Refresh in Edinburgh

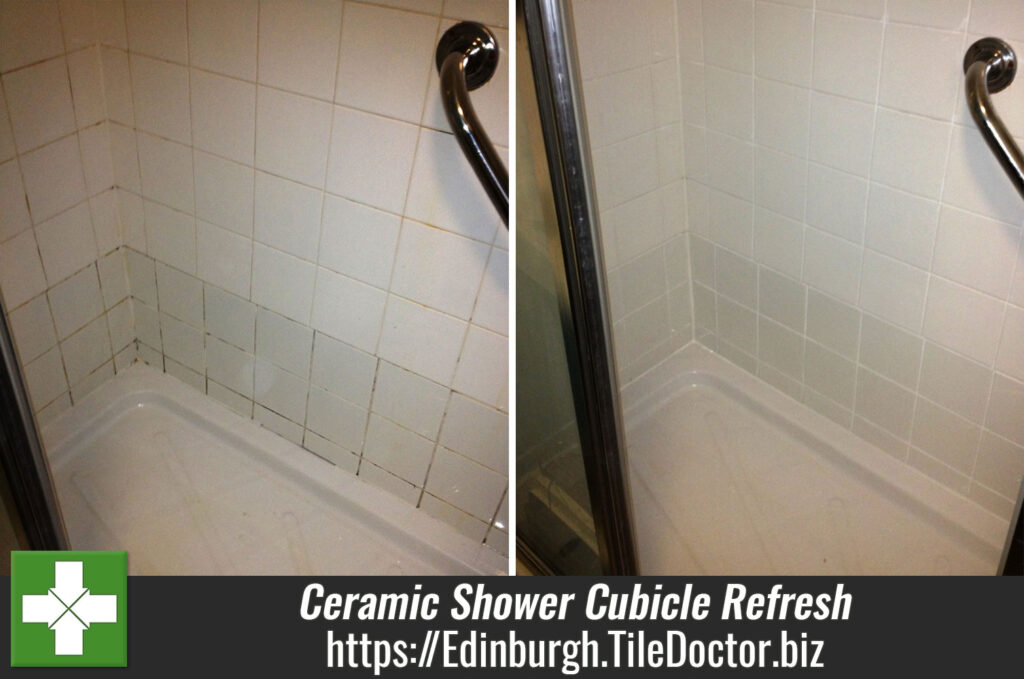
Stained Ceramic Tiled Shower Cubicle Refresh in Edinburgh

Keeping the tile and grout in shower cubicles clean is often a headache for homeowners and this cubicle at a house in Edinburgh was certainly no different. You can see from the photograph below that although the glazed ceramic tiles were in good condition they were being made to look grubby by the stained condition of the adjacent grout and there were also signs of mould build-up. If you catch this early you can overcome the problem spraying on a product called Tile Doctor Mould-Away however in this case a full refresh was required.

Shower Renovation Before Cleaning

Cleaning Ceramic Tile and Grout

We started by spraying the tile and grout down with Tile Doctor which is a strong alkaline cleaner Pro-Clean, spraying it on mixes it with helping it to stick to Vertical surfaces where it can get to work on the dirt. We left it to dwell for ten minutes before scrubbing it in by hand using a stiff grout brush; this process certainly improved the grout but unfortunately it had become too badly stained to be satisfactory so it was agreed with the owner that we would recolour the grout using a white grout colourant.

Recolouring Grout

The grout colourant comes in a tube and is very straightforward to apply although I must admit the work is quite tedious. Two coats of white colourant were required to get the uniform appearance needed and I think you will agree the effect is quite transforming. The other advantage of these particular colourant products is that they are epoxy based and form a barrier of the grout preventing future staining and making it very easy to clean going forward.

Shower Renovation After Cleaning
The last step was to carefully remove the existing silicon strip along the base of the cubicle with a sharp nice and replace with new. The final result was a shower cubicle that looked recently installed.

Refreshing a Ceramic Tiled Shower Cubicle in Edinburgh

Stained Ceramic Tiled Shower Cubicle Refresh in Edinburgh Read More »
=================================

Edinburgh Tile Doctor

================================= Read More »

Scroll to Top